Friday, April 15, 2016

Upbeet Day

Hello there! I'm up on the Ink Road Blog with this colorful card today. Aren't those veggies adorable? Just looking at them all lined up and smiling makes me happy. Let's jump right in on how to make the card. 
The little pots where I "planted" the veggies are from the Stuck on You  stamp set from Lawn Fawn.
I used a ruler to line up the pots the best I could and stamped them with Avery Elle Fizz pigment ink. To give the pots a weathered look, I inked up the outside edge of the pot stamp with some Cosmic Copper Brilliance Dew Drop pigment ink from Tsukineko. 
I stamped the pots onto a Post-It note and cut them out to make masks. The adorable veggies are from the Rooting for You stamp set from Lawn Fawn. I stamped the turnip with Buttercream and Soft Lilac inks from Altenew. The carrots are stamped in Sunkist ink from Simon Says Stamp and Caramel Toffee from Altenew. The beet is stamped in Lavender ink from SSS and Orchid ink from Ranger. The little radish is stamped in Coral Berry ink from Altenew. The light green is Frayed Leaf and the darker green is Forrest Glades from Altenew. The watering can is stamped in Fog ink from SSS and I inked up the outside edge of the watering can with Platinum Planet Brilliance Dew Drop from Tsukineko. The water pouring from the watering can is stamped in Scuba ink from SSS. 
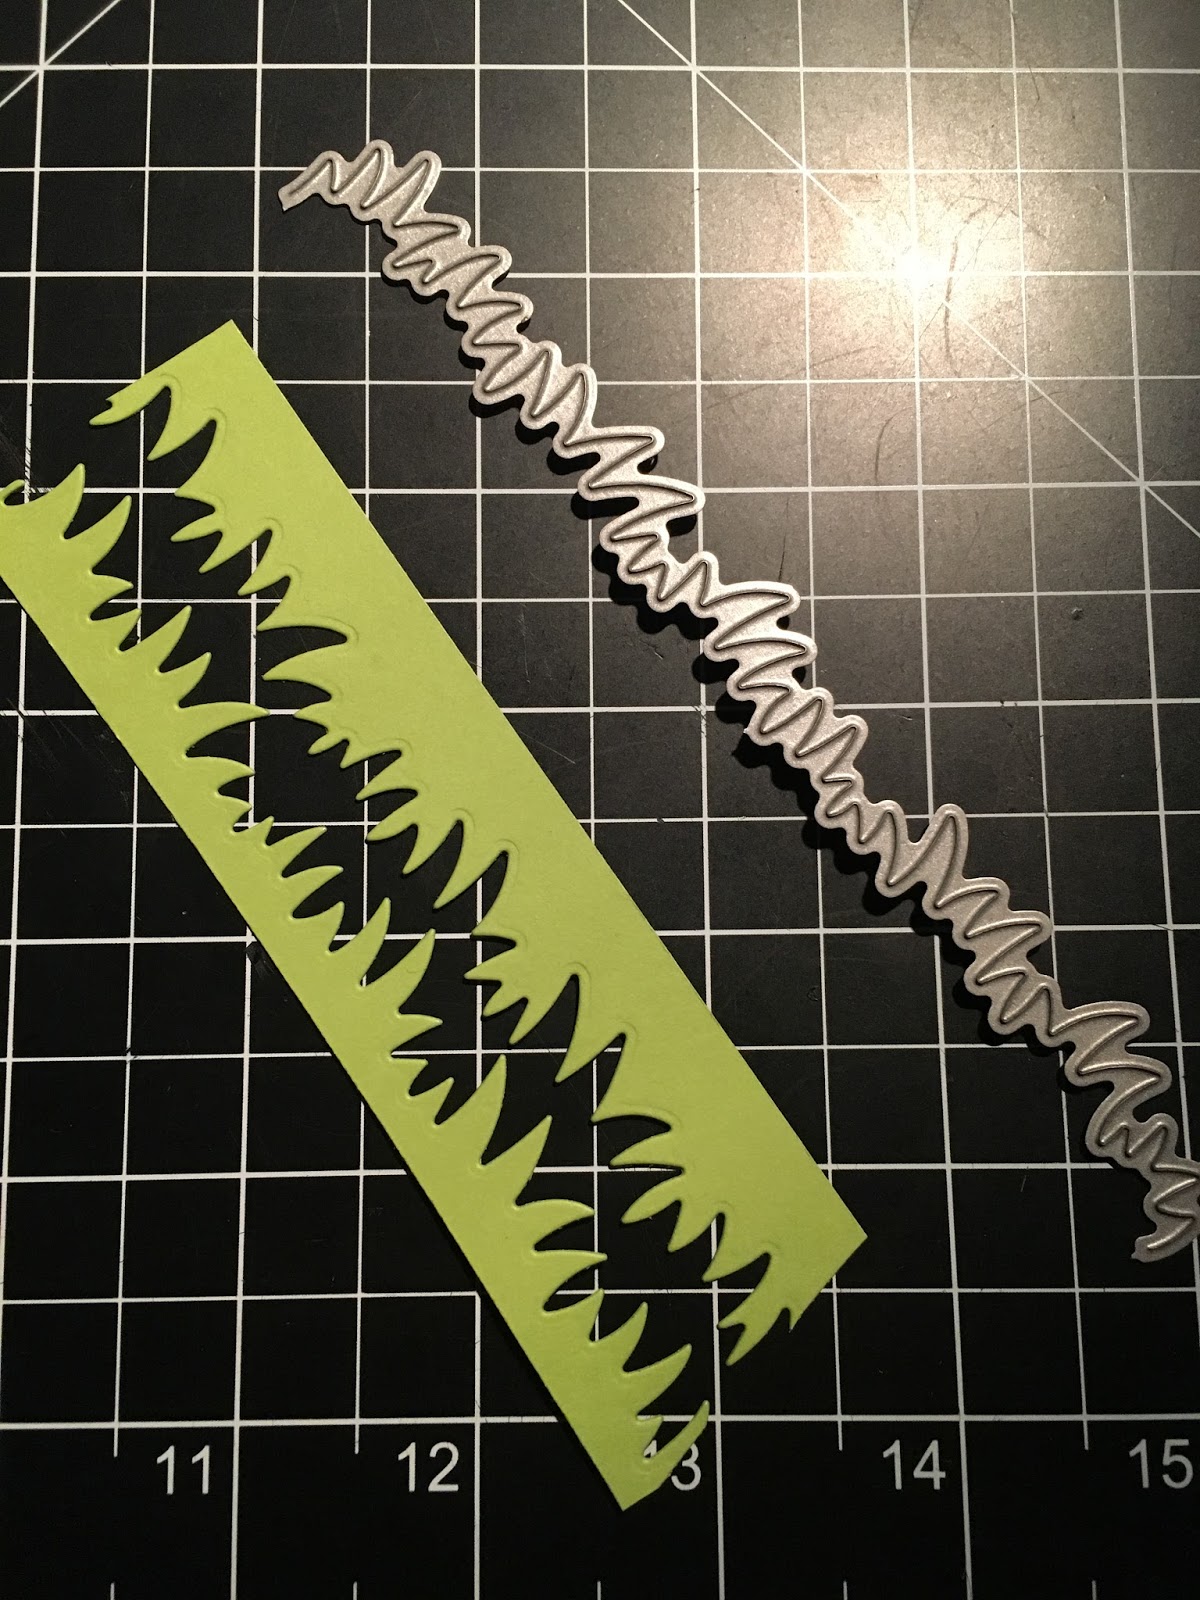
I die cut some grass using some scrap cardstock and the Grassy Fields die. I ended up flipping the taller piece around and using it as another layer of grass. After the two layers of grass were adhered, I used my craft pick to bend up the blades of grass for some dimension. I white heat embossed the sentiment onto some kraft cardstock and popped it up with a bit of foam tape.The wood panel patterned paper is from Pink Paislee, C'est La Vie Collection #9. I finished the card with a little string of natural twine from May Arts. 

Here's a quick list of products used for the card:
Lawn Fawn, Stuck on You stamp set
Lawn Fawn, Rooting for You stamp set
Pink Paislee, C'est La Vie Collection #9 patterned paper

These lovely products are available at The Ink Road Shop.  Be sure to punch in the code MONICA10 to save 10% off your next order. Use anytime, as many times as you would like. Thanks so much for visiting today. I'll see you soon.

Friday, April 8, 2016

Heart of Gold

Hello there! I'm up on the Ink Road Blog again with this fun shaker card. Let's take a look. 
Shaker cards are so much fun to make and especially fun to send. Let's get right in to how I put this card together. 
I started with some Tim Holtz Distress inks in Dried Marigold, Spiced Marmalade, and Picked Raspberry. I tried to match the gorgeous Sunset Shimmer sequin mix from Neat and Tangled. I used the Heart of Gold Die from Neat and Tangled to cut a heart into the color blended panel and once again out of some gold glittered cardstock and removed the triangle pieces from the gold heart. I went around the back side of the heart (of the blended panel) with some Scor-Tape and adhered a piece of acetate to make the shaker window. 
I die cut the blended panel using Avery Elle's Wonky Stitches die for more of a finished look. I doubled up my foam tape and cut it in half to make (roughly) 1/4 strips to go around the heart and around the perimeter of the blended panel. 
I flipped the blended panel over and carefully glued the gold glittered die cut heart onto the acetate. I flipped the panel back over and put the sequins in. I hold the panel up so I can see if I'm happy with how they look inside the window and to see if I have enough sequins before I adhere the panel onto the card base. I piled the sequins onto the card base and then adhered the panel over them. I used the Heart of Gold stamp set from Neat and Tangled for the sentiment. I masked off the word gold with a Post-it note and gold heat embossed the word "gold" afterward. I used the Distress Inks to match my blending onto the edge of the sentiment strip. I ran the edge of the sentiment panel through the Wonky Stitches die to bring the card together and cut a strip of that gold glittered cardstock for a peek-a-boo of bling. 

Here's a quick list of some products I used for the card:
Neat & Tangled, Heart of Gold Die
Neat & Tangled, Heart of Gold stamp set
Neat & Tangled, Sunset Shimmer Sequin Mix

These lovely products are available at The Ink Road Shop.  Be sure to punch in the code MONICA10 to save 10% off your next order. Use anytime, as many times as you would like. Thanks so much for visiting today. I'll see you soon.

Friday, April 1, 2016

Unicorn Daydream

Hello there! I'm up on the Ink Road Blog again with this fun, magical card today. Let's go have a look. 
I gold heat embossed the unicorn from the Be a Unicorn stamp set from Avery Elle. The rainbows are heat embossed with white embossing powder and all are embossed onto Strathmore cold pressed watercolor paper. I used Tsukineko Gansai Tambi watercolors to bring the images to life. I used the matching Be a Unicorn Dies to die cut the images and set them aside. 
I used the Lawn Fawn Stitched Rectangle Dies to create a frame for the card. I used the Chevron Gold vellum paper from Pinkfresh Studio to go inside the frame and add some beautiful bling. 
I arranged the unicorn and rainbows on the front of the card and carefully slid a glue dot under the pieces that would stay on the outside of the frame. I gently flipped the frame and die cut pieces over and added foam tape to the pieces that I wanted to give dimension to. I gold heat embossed the Don't. Ever. Quit Your Daydream sentiment from the Good Sayings stamp set from Pinkfresh Studio and used some scrap blue cardstock to mat the sentiment. 

Here's a quick list of some products used for this card:
These lovely products are available at The Ink Road Shop.  Be sure to punch in the code MONICA10 to save 10% off your next order. Use anytime, as many times as you would like. Thanks so much for visiting today. I'll see you soon.