Friday, August 12, 2016

Baby Shower Card

Hi there! I'm up on the Ink Road blog with this colorful baby shower card. Let's take a quick look.
This card is perfect to keep in your card stash and the best part is that it can be used for a baby girl or boy. Let's jump right in to how I put it together. 
I stamped the cloud from the Little You stamp set from Crate Paper and cut it out. I adhered some pink enamel dots from the Little You embellishments collection to the cheeks of the cloud to give it some interest and dimension. 
I used some patterned paper from the Millie & June collection from Fancy Pants and the cloud stamp from Amy Tangerine's Oh Happy Life stamp set. The ink is Mermaid from Lawn Fawn. I only stamped three rows of clouds since the rest of the panel would be covered by the arched rainbow patterned paper panel. 
I used a piece of patterned paper from the Oh Happy Life collection from Amy Tangerine and the Stitched Slopes and Hills die from Simon Says Stamp to make an arch on the top part of the paper panel to give the look of a rainbow. I decided to make a quick banner for the sentiment from the Little You stamp set. I stamped the sentiment, scored the fold lines and cut the fishtails on each end of the banner. I added a bit of foam tape to the center part of the banner and some Scor-Tape for the fishtails to keep it securely adhered. I added foam tape to the back of the cloud and some Puffy Dot stickers from Milly & June

Here's a quick list of products used for the card:
Crate Paper - Little You stamp set
Fancy Pants - Puffy Dot Stickers
Amy Tangerine - Oh Happy Life stamp set

 These beautiful products are available at The Ink Road Shop.  Be sure to punch in the code MONICA20 to save 20% off your next order. Use anytime, as many times as you would like. Thank you so much for visiting today. I'll see you soon. 

Friday, August 5, 2016

Let's Celebrate

Hi there! I'm up on the Ink Road blog with this super happy birthday card. I'm sharing another way to make the most of your themed or special occasion stamps to use them all year round.  Let's take a look.
I love seeing all of those critters together, they're so cute! Let's jump right into how I put this together.
I die cut the paper panel using Simon Says Stamp Stitched Rectangle dies and placed a row of critters that wouldn't be touching. The bunnies are from the Happy Easter stamp set, the chick is from Chirpy Chirp Chirp, the Racoon is from the Holiday Party Animal stamp set and the Hamster is from the Wheelie Like You set, which are all from Lawn Fawn. 
I stamped the birdies that would be touching the first row of animals as a second step because if you wanted to stamp everything together, they wouldn't line up right. The two birdies with hats are from the Lawn Fawn Party Animal stamp set and the bird without the hat is from the Happy Easter set. I masked some of the animals off with some Post-It tape for the next step. 
Here's the fun part, I used the EGG stamp from the Chirpy Chirp Chirp set as a balloon for the critter party! I turned the egg upside down and used the dashed line that was supposed to be used to show the butterfly's flight pattern as the string for the balloon. I drew in a quick string bow with my marker to bring the whole balloon together and because the animals are masked off, the strings look like they are behind them. I used Copic markers to color the critters and balloons and decided to color and die cut some hats and accessories from the Party Animal set. I silver heat embossed the sentiment from the Holiday Party Animal set onto some vellum and taped it on the back side of the panel. I die cut a scalloped black panel as a mat to bring a fun edge to the whole card and called it a day. 

Here's a quick list of products used for the card:
Lawn Fawn - Happy Easter stamp set
Lawn Fawn - Chirpy Chirp Chirp stamp set
Lawn Fawn - Wheelie Like You stamp set
Lawn Fawn - Holiday Party Animal stamp set

These beautiful products are available at The Ink Road Shop.  Be sure to punch in the code MONICA10 to save 10% off your next order. Use anytime, as many times as you would like. Thank you so much for visiting today. I'll see you soon. 

Friday, July 29, 2016

Rose Shaker Card

Hi there! It's that time again! It's product release day for Kennedy Grace Creations. 
https://blogger.googleusercontent.com/img/b/R29vZ2xl/AVvXsEgoJJM9p1BjgVwP1XQY1P7bp4XEr_0UdiI6irrVcZTbp6rufGmW1woQcQnYD1UXBo8bAjmCFr4dY7ANL6k_oSfPOB50SPSJIbK17wUxKiUZGF_Xv_gBD1LPPdcM2YDKacNfiX0b0JfJ6MAU/s1600/hop.jpg


I made a quick shaker card with the Splendid Roses stamp set, let's take a look.
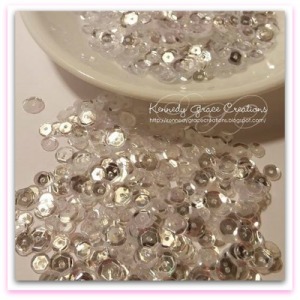
 I stamped the roses in some Fog ink from Simon Says Stamp and once again on another panel with some Versafine Onyx Black ink. I used the Inside & Out Rounded Rectangle STAX from My Favorite Things to die cut the oval, and used the Moonbeams sequin mix and the Frosted Cupcakes mix as well for a pop of color. I white heat embossed the sentiment onto some black cardstock and called it a day. 
https://blogger.googleusercontent.com/img/b/R29vZ2xl/AVvXsEgloHQrnl5N7wAtByfQGn2csl_c-M7fTMQmFllAkyy5_drZZFXOKTc84BAjaP-3n50VakGBzGPYUEGmWbapAezYHh5xV4Jx1aJykBnzOYXp9AaXXKna3DjRZo_Yy7zqBS8SWaPxYcO5uW2t/s320/15.00.jpg
To celebrate the July Release we will be giving away to 1- lucky winner a $15.00 gift certificate to the online store.
All you have to do is :
Leave a comment on this blog post and on all of the stops along the hop.
Be sure to start at the beginning of the hop if you haven't already


Cammy 


Thank you so much for visiting today!


Friday, July 22, 2016

Die Cut Wedding Card

Hello there! I'm up on the Ink Road Blog with this super simple wedding card. All easy peasy die cutting to put together a gorgeous wedding card. Let's take a look.
No stamping at all today! Just some easy die cutting to make a beautiful wedding card. Let's get right into it...
I used this fantastic gold foil patterned paper from My Mind's Eye, On Trend collection. This amazingly versatile die is from Neat & Tangled, Wholehearted Cover Plate. This die cuts out some of the hearts and cuts half hearts for you to be able to fold them out into full hearts! It's so nifty, right?!?!
I used some scrap gold foil cardstock and glittered cardstock to cut just the hearts out from this die. I inlaid the gold hearts back into the patterned paper to add lots of shine. 

I die cut the sentiment from the Love You, Happy and Forever die set from Little Yellow Bicycle four times to give the sentiment a faux chip board look for dimension. Just a little glue and your die cut sentiment packs a bigger punch on your card! I added some foam tape to the back of the entire panel for even more dimension and called it a day. 

Here is a list of products used for the card:

These beautiful products are available at The Ink Road Shop.  Be sure to punch in the code MONICA10 to save 10% off your next order. Use anytime, as many times as you would like. Thank you so much for visiting today. I'll see you soon. 


Friday, July 15, 2016

Happy Jellyfish

Hi there! I'm up on the Ink Road blog with this all occasion card that will be fun to give away but even more fun to make. Let's take a look.
I love those adorable jellyfish, they would make anyone smile! I'm using a technique that I saw my coloring/cardmaking hero Sandy Allnock use. She's an amazing artist. Let's get right into the card.
I used the snow globe from the Ready, Set, Snow stamp set from Lawn Fawn. I masked off the top portion of the globe and did some partial die cutting from the Ready, Set, Snow die set
I repeated the same steps for the top part of the snow globe. I used a ruler and a Memento Dual Marker to stretch the globe to make it into a mini jellyfish aquarium. I matched up the die cut lines from the top and bottom and used an X-acto knife and ruler to cut out the entire piece. 
I die cut the mid size puffy cloud from the Puffy Cloud Border die from Lawn Fawn and used it along the top of the aquarium for a few subtle waves. I adhered the aquarium to some scratch paper and did some soft ink blending in Tumbled Glass, Peacock Feathers and Mermaid Lagoon. I stamped the jellyfish from the So Jelly mini stamp set from Lawn fawn and the So Jelly dies to cut them out. I gave the jellyfish some color with Copic markers. The rock and seaweed are from the Mermaid for You stamp set and the sentiment is from the Ready, Set, Shake stamp set; both from Lawn Fawn. To finish the card, I stamped the bubbles from the So Jelly set and gave them some dimension with some Ranger Glossy Accents. I added some foam tape behind the sentiment for some interest and the gorgeous patterned paper is from Crate Paper

Here is a list of products used for the card:
Lawn Fawn - So Jelly stamp set
Crate Paper - Inspired 12x12 paper
These beautiful products are available at The Ink Road Shop.  Be sure to punch in the code MONICA10 to save 10% off your next order. Use anytime, as many times as you would like. Thank you so much for visiting today. I'll see you soon. 

Friday, July 8, 2016

Animal Selfies

Hi there! I'm up on the Ink Road Blog again with this fun thank you card for your favorite animal lover. Lets take a look at the card. 
I saw Nina from Waffle Flower use this grid technique and I thought I could apply this using these awesome Hipster Animals from Hero Arts. It's a lot easier than it looks. Lets get right into it.
I mapped out a quick 3x3 inch grid to make the 9 boxes. I used the 1x1 inch square from the Simon Says Stamp Stitched Squares Dies to cut a mask with some scrap cardstock. 
I used some Copic friendly Tsukineko Memento ink in Tuxedo Black to stamp the animals, using a bit of washi tape to secure the mask. 
After having all the animals stamped out how I liked them, I stamped in their glasses and acessories and gave them some simple, loose coloring with Copic markers. I went over the animals with some Clear Wink of Stella for some shine.
I thought it would be fun to turn the grid into a group selfie Polaroid picture. I cut a 4 1/2 x 3 3/4 rectangle from some black cardstock and used the 3 1/2 square die from the same Simon Says Stamp die set to make the Polaroid frame. I used some paper from the Pink Paislee C'est La Vie collection and die cut the sentiment from some scrap cardstock using dies from Little Yellow Bicycle

Here is a quick list of products used for this card:

These beautiful products are available at The Ink Road Shop.  Be sure to punch in the code MONICA10 to save 10% off your next order. Use anytime, as many times as you would like. Thank you so much for visiting today. I'll see you soon. 


Friday, July 1, 2016

Coffee & Friends

Hi there! I made this card for one of my cat loving Roadies. This adorable stamp set came with a cat image and I knew I wanted to make something fun for her. Lets get right into the card.
I decided to have some fun with the size of the card. The card measures 4 x 7 inches and the gorgeous patterned paper is from Pinkfresh Studio, Felicity.
The stamp set is from Neat & Tangled called Perfect Blend. I stamped the cup three times in some Copic friendly Memento Tuxedo Black ink and die cut them using the Perfect Blend die set. To stamp the coffee I used Altenew ink in Paper Bag. I went along the edge of the cup with some Copic markers for a little shadow and a touch of color. 
I thought the coffee needed more interest so I added some Ranger Glossy Accents to give the coffee some shine.
I didn't want to cover up this gorgeous paper so I went with vellum. I thought the vellum needed some interest as well so I used the Dots & Dashes die from Paper Smooches to add a bit of fun. I white heat embossed the sentiment onto some scrap gray cardstock and die cut the dots on the bottom to bring the card together. 

Here is a quick list of products used for this card:
Pinkfresh Studio - Felicity 6x6 paper pad
Neat & Tangled - Perfect Blend stamp set
Neat & Tangled - Perfect Blend die set

These beautiful products are available at The Ink Road Shop.  Be sure to punch in the code MONICA10 to save 10% off your next order. Use anytime, as many times as you would like. Thank you so much for visiting today. I'll see you soon.